| Better Bevels in Cinema 4D | |
|
Overview This tutorial will show you an alternative way to create extruded beveled text in the program - a way that gives you more control, and better results. |
|
|
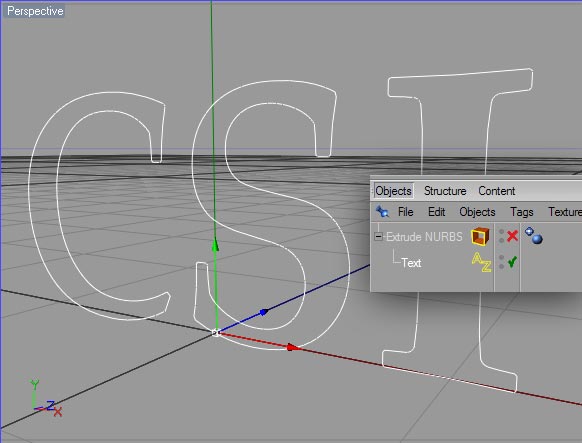
Here we have a typical situation - a text spline primitive placed inside an Extrude NURBS modifier. |
 |
|
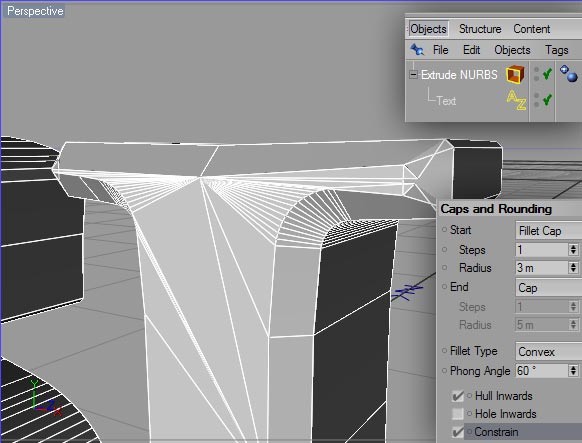
When we apply some basic bevelling to this object, the result is malformed polys at the corners. This is a result of features in the letter outlines being too small, or at acute angles, for the features being added by the bevelling settings. These errors in the bevels can be corrected in some instances by changing the detail of the spline object, changing the font, or by changing the radius or type of the bevel. Sometimes, however, we are constrained by design decisions out of our control and we have to fix the issue another way. |
 |
| Here we can see that the malformed object polys have resulted in visible problems in the rendering of the object. Unacceptable! | 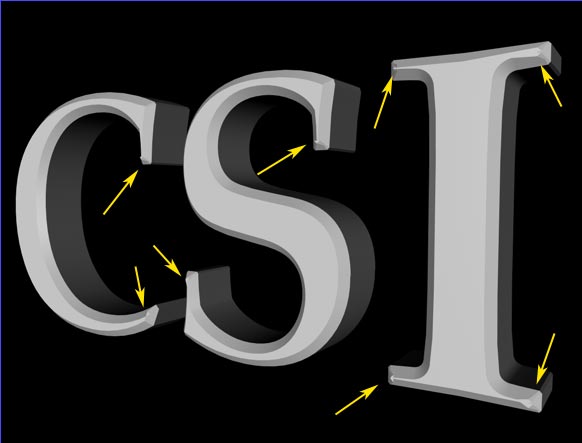 |
|
To fix this problem, we are going to create the text splines in Adobe Illustrator. Select the correct font, set the text, and then scale the text up to a large size in Illustrator's workspace. Once you have the text created, drag the origin point of the ruler down to the center of the text. The origin point determines where the final object is going to appear when we bring it into Cinema 4D. Setting it here will ensure that the splines will be centered in C4D. Once you have done this, convert the text to outlines. |
 |
|
Once you have outlines, we are going to use Illustrator's Offset Path function to shink the path within itself by 5 points. This will create the inner bevel for our object in Cinema 4D. Now, this point is important. Offset Path will create new paths in the Adobe Illustrator document that are the correct shape for our bevel, but the number of points on the outer and inner paths may differ. For our beveling solution to work correctly in Cinema 4D, both the inner and outer paths have to have the same number of points, and the same structure. The following steps will achieve this. |
 |
| For example, if we look at the two paths that make up the letter "C", we can see that there are differences in the number and placement of points in the two paths. It is possible to do some fancy spline editing in Illustrator to correct this problem, but I am going to show you a faster, simpler method that does not involve you carefully dragging out bezier spline handles and sweating the details of spline shapes. |  |
|
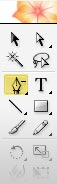
The green arrows indicate areas where we are going to add points to the spline using Illustrator's "add points" tool. It can be found on Illustrators tool palette here:
Simply click once on each section of the splines where you want to add points, and Illustrator will do so without changing the shape of the spline. |
 |
|
The red arrows indicate where we are going to be removing points from the splines using Illustrator's Remove Points tool. It can be found on Illustrator's tool palette here (the small triangles in the bottom right corner of some of the tools in Illustrator's tool palette indicate that the tool has multiple modes - clicking and holding a tool should reveal a small pop-out menu with the other tool modes on it).:
Simply click on the points you want to remove, and Illustrator will bridge the gap between the adjacent points. |
 |
| Here we can see the result. The yellow arrows indicate a point to point correspondence between the points on the inner and outer splines. We need to keep going around all of the splines, adding or removing points, until both splines have the same number points in the same places. More examples follow: |  |
| Here we are simply going to add two points, and remove one. Roll over the image with your mouse to see the results. |  |
|
Here we have the lower portion of the letter "S" with the points to be added and removed indicated. Roll over the image with your mouse to see the results. Continue around all of the letters until you have corrected the point correspondence between the inner and outer splines. |
 |
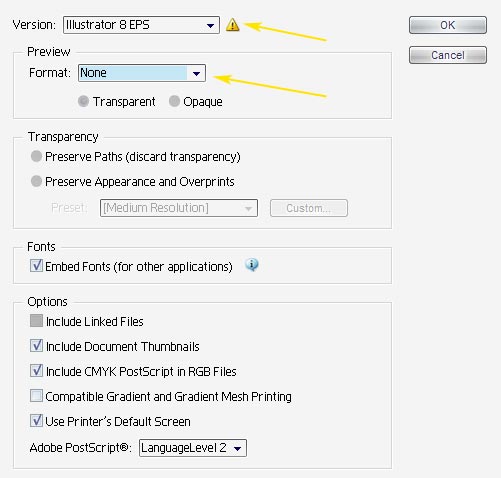
| When you are finished fixing all of the spline points, save the resulting illustration out as an Illustrator 8 EPS, with no preview. You can leave all the other options at their defaults. |
 |
| Now, back in Cinema 4D, open the EPS file you just saved from Illustrator. If all went well, you should see the splines centered in Cinema 4D's world space. However, there seem to be 3 Paths. Cinema 4D has grouped the paths according to how they are nested, and in this example it sees three groups - the inside and outside of "C", the inside and outside of "S" and the inside and outside of "I". To fix this, select all three paths in the Object browser, and select "Connect" from the Functions menu. This will create a new, merged spline object. Delete the originals. | 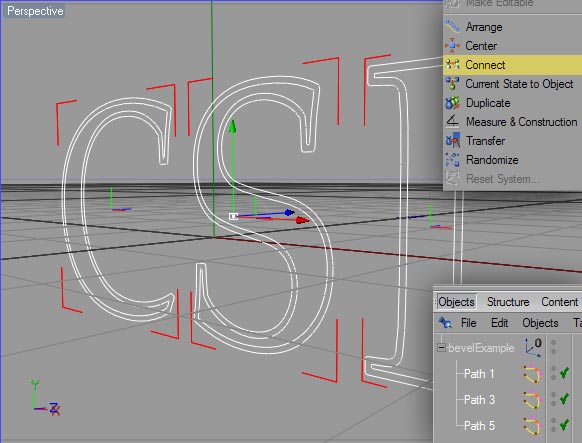 |
| Make a copy of your new merged spline. Call one "path Inside". Switch to "Point" mode and select one point in each of the OUTSIDE splines. Then from the Selection menu, pick "Select Connected". All the points in the outside splines should be highlighted. Make sure you have the Perspective window highlighted (click once on its menu bar in the blank area between the menus and the move, zoon, and pan icons above the perspective viewport) and then hit Delete on your keyboard. This should leave only the inner spline points behind. | 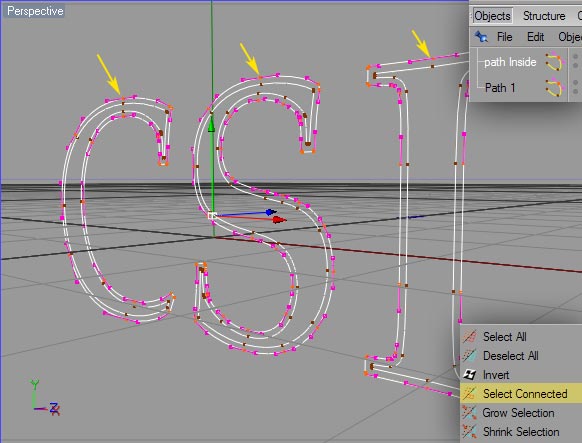 |
|
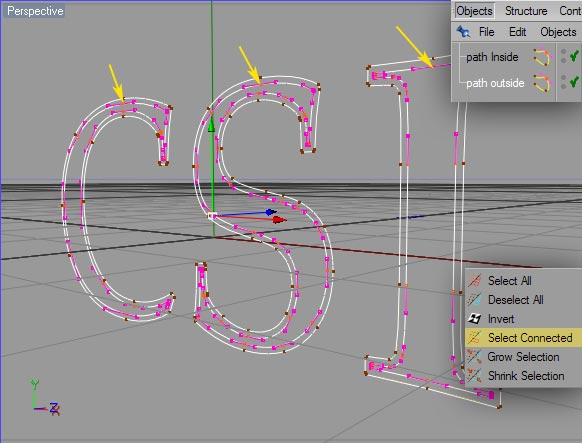
Name the second copy of your spline "path Outside", and select one point on each of the INNER splines. Choose "Select Connected" from the Select menu, and again, making sure you have the Perspective viewport selected, hit Delete on your Keyboard. You now have two splines - one with all the outer paths of the letters, and one with all the inner paths of the letters. |
 |
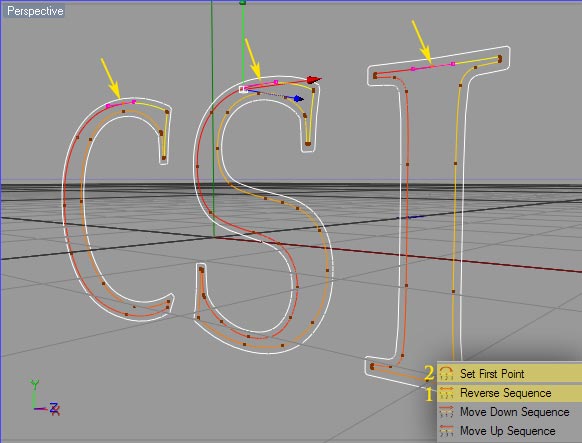
| Now, select the "path Outside" object, and in point mode, select the topmost point of each spline. Go to the Structure/Edit Spline menu, and choose "Set First Point". You should notice that the yellow - red gradient coloring of the splines starts and ends at these new points. | 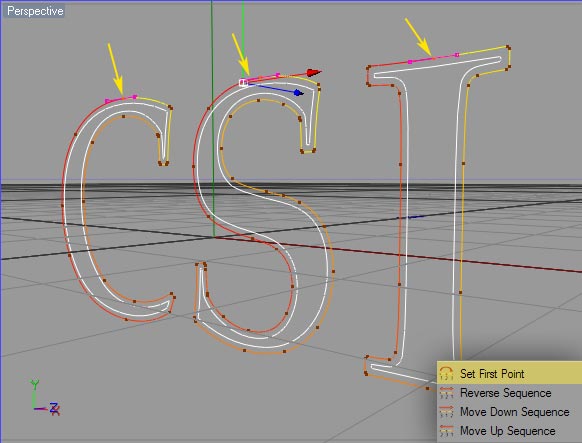 |
|
Select the "path Inside" object, and in point mode, select the topmost point of each spline. From the Structure/Edit Spline menu, first choose "Reverse Sequence", and then choose "Set First Point". The reason for doing the reverse sequence step is that when Cinema 4D imported the splines, it considered the inner spline to be a hole in the outer spline, and reversed the sequence of points in the spline. For our bevelled text trick, we need both splines to be running in the exact same point sequence, in the same direction. |
 |
|
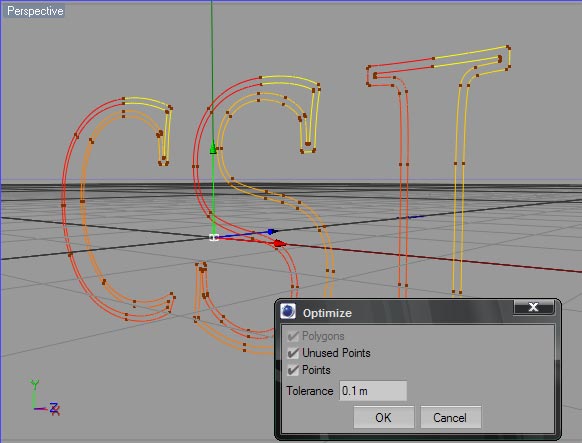
With both path objects selected we can see that now they both have the same starting point, and both run in the same direction, indicated by the yellow-red gradient coloring of the splines. Sometimes you'll have a situation where the splines look like they have the same number of points, but one spline will have two points in the exact same position. To avoid this problem, you should choose "Optimize" from the Functions menu, and change the default tolerance to 0.1m. Click OK and Cinema 4D will merge any points that are closer than the tolerance distance together. |
 |
|
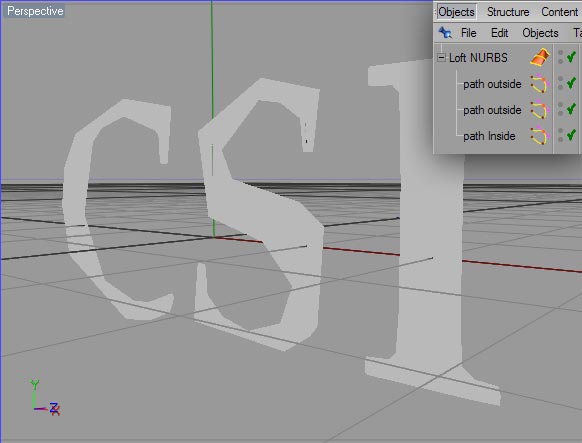
Add a Loft NURBS modifier to the object heirarchy, and drag the "path Inside" and "path Outside" objects into it. You'll also need a second copy of the "path Outside object, so copy and paste one in there. The result looks unfortunate. We have to tweak the Loft NURBS settings, and position the paths so that we get our beveled and extruded final object. The problem here is that the Loft NURBS object does not have enough resolution in the U dimension to allow the letters to have smoothly curved shapes. |
 |
| Here we have adjusted the Loft NURBS settings. The "Mesh Subdivision U" parameter determines how finely divided the shape of our letters is going to be. Higher values give smoother results. The "Mesh Subdivision V" parameter controls how finely divided the length of our lofted object will be. Since we are not going for any kind of organic shape, its safe to reduce this value to the minimum of 2. We also want to turn on "Linear Interpolation" to ensure the sides and bevels of our letters are nice and straight. | 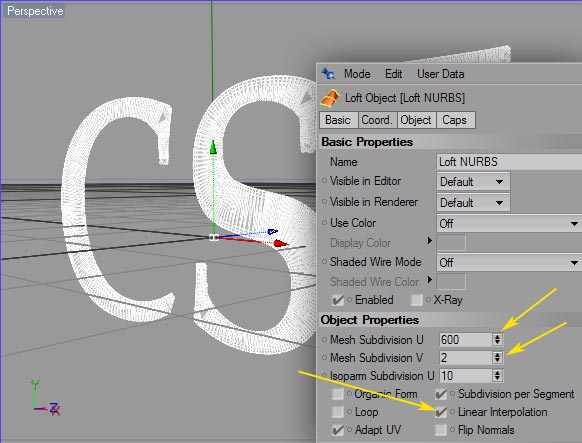 |
|
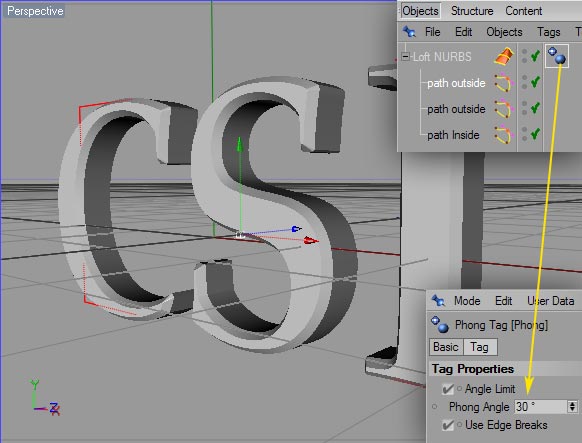
In Object mode, select the "path Inside" object and pull it forwards in Z some distance. How much is up to you... how deep do you want your bevel to be? The location of the "path Inside" spline relative to the first "path Outside" spline controls the depth of the bevel. Select the topmost "path Outside" object and move it backwards in Z some distance. The position of this spline relative to the first "path Outside" spline controls the depth of the extrusion. You'll probably have noticed that after this step, the object shading looks too soft. You'll need to sharpen up the edges. You can do this by clicking the Phong Tag on the Loft NURBS object, and setting its value to something below 45° . Here I used 30° to sharpen up my example object. |
 |
| Here you can see the final results of all of our hard work - a very clean object mesh with no mangled polys, and a clean render result. Acceptable! | 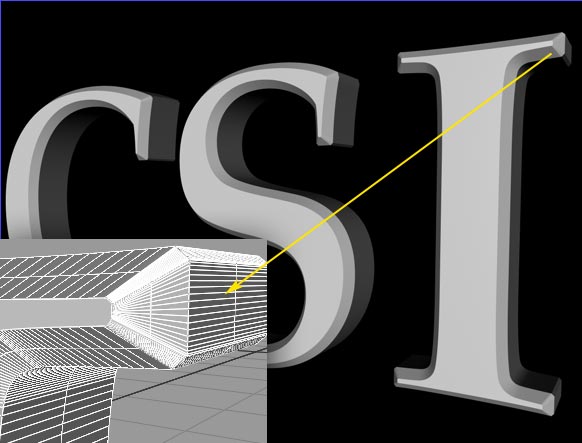 |
| close window | |

this site works best on Firefox: |