| Bulb Modelling Tutorial - Page 7 |
|
|
|
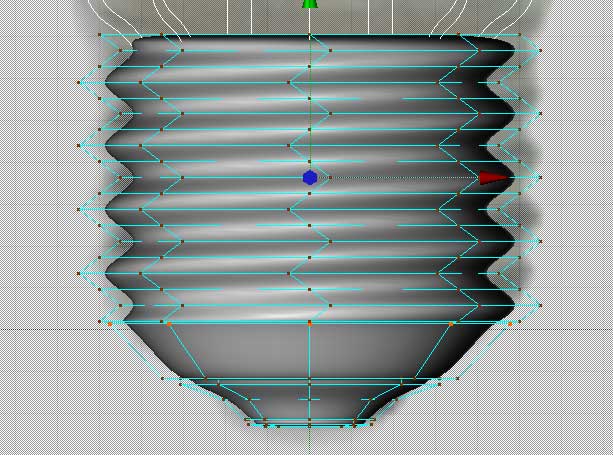
Step 15:
Return to Point mode and the FRONT view. Make sure no points are selected.
Go to the STRUCTURE menu and choose OPTIMIZE, and OK the small dialog
that pops up. This will make sure the caps of our cylinder are welded
to rest of it, which will allow the Hypernurbs object to do its work.
Now, using the Rectangle Selection tool, and making sure "Only Select
Visible Elements" is turned OFF in the active tool selection, grab
the row of points that represents your first Bevel and pull them UP in
Y (as shown above). This will reinforce the edge there.
|
|
|
|
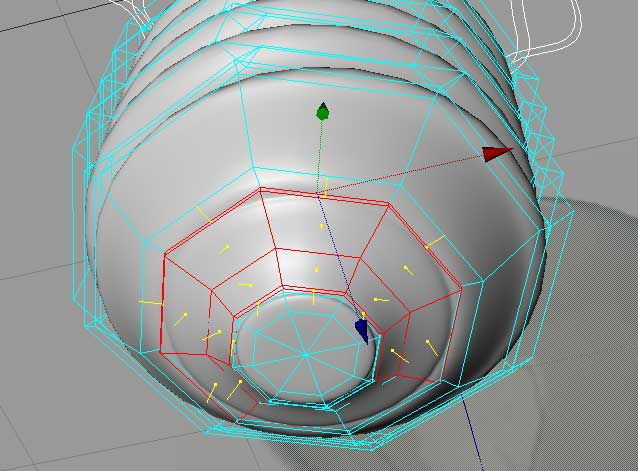
Step 16:
Switch to poly mode, and pick the Live Selection tool. Make sure Only
Select Visible Elements is turned OFF in the Active Tool pane, and in
the Front view, drag select across the line that bisects the insulator
area to select the two rows of polys there. Then go to the SELECTION menu,
and pick GROW SELECTION. The highlighted polys should now include the
small inset polys at the edges of the insulator area. Go to the SELECTION
menu, and chose SET SELECTION. The poly object in the heirarchy should
now have a small triangle tag. Select it, go to the Attributes tag, and
click the BASIC button. Change the name from "Polygon Selection"
to "Insulator". This will help us with texturing the object
later. Now click on the object in the Heirarchy to deselect the triangle
tag (very important!)
|
|
|
|
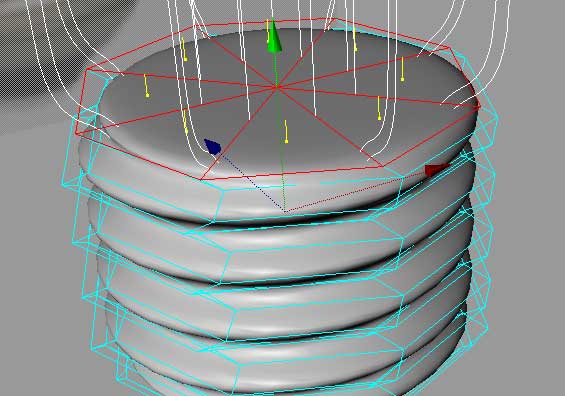
Step 17:
Using the Live Selection tool, and making sure Only Select Visible Elements
is turned ON in the Active Tool pane, select the 8 polys at the top of
the cylinder.
|
|
|
|