| Planet Rendering Tip 2 - Rings Around Uranus | |
|
Overview |
|
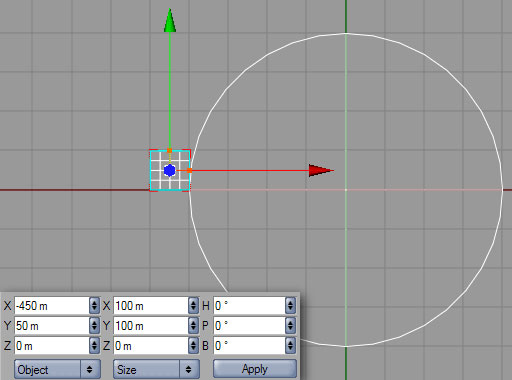
| First determine how wide you want the rings to be. For the purpose of this tutorial, I am going to set the rings to be 100 meters wide. So, here I have created a plane object 100 meters wide, and 100 meters tall. I have set the Width Segments to 1, and the Height Segments to 100. Finally, I have set the plane to have a -Z orientation. | 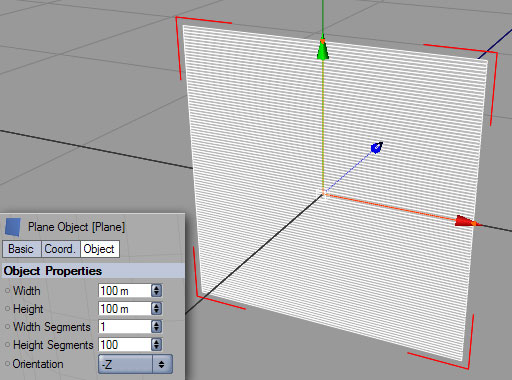 |
|
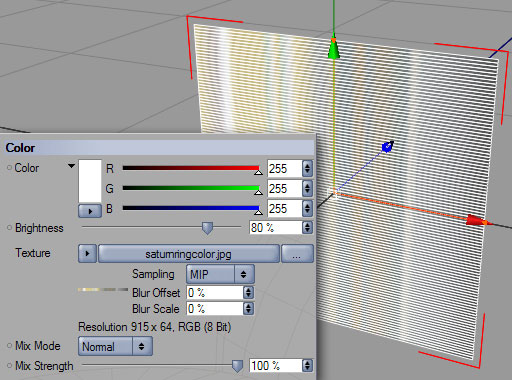
Next, create a new Material and assign the desired ring texture to the Color channel. I am going to ignore the other ring texture attributes in this tutorial, so we won't be bothering with the Alpha channel or other texture channels. Apply this new material to the Panel object. The default texture application is UVW Mapping, and this is what we want.
|
 |
|
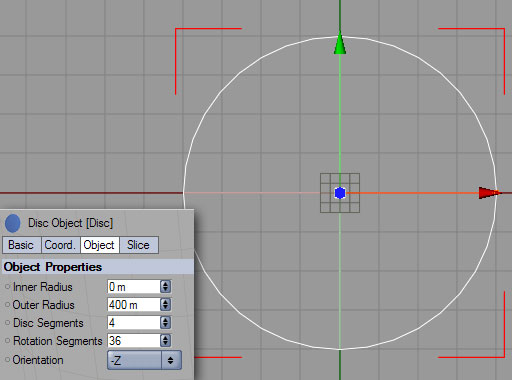
Next, determine what you want the inner radius of your ring to be. For the purposes of this tutorial, I am going to set the inner radius of my ring object to be 400 meters. As a guide, add a Disc object to the scene. Set its radius to 400 meters, and give it a -Z orientation. This disc object is just going to be used for reference in sizing our ring, and will be deleted from the scene after we are using it, so you can leave all of the other settings at their defaults. |
 |
|
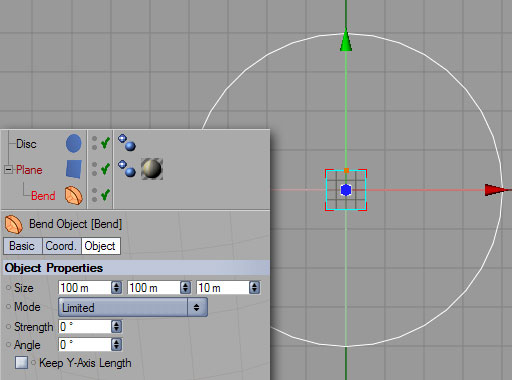
Add a Bend modifier to the scene, and make it a child of the Plane object. Set its size to 100x100x10. For now, we will leave the other settings at their defaults. |
 |
|
Now, reposition the plane object relative to our Disc guide object. Because we specified a 100x100 plane object, we need to position it at 50 on the Y axis, and -450 on the X axis so that the bottom of the plane is aligned with the center axis of the Disc, on its left hand side, as shown here. (One half of 100 is 50.) |
 |
| Click on the Bend modifer in the object hierarchy, and change its Strength setting to 360. You will see that the plane object bends around into a comple circle. I am not sure of the math on this, but if you check, you'll find that the inner radius of the resulting ring is 16 meters. Different plane sizes result in differently sized default inner diameters. This default inner radius is a constant that you have to account for when adjusting the Bend modifer to give the desired inner ring radius. | 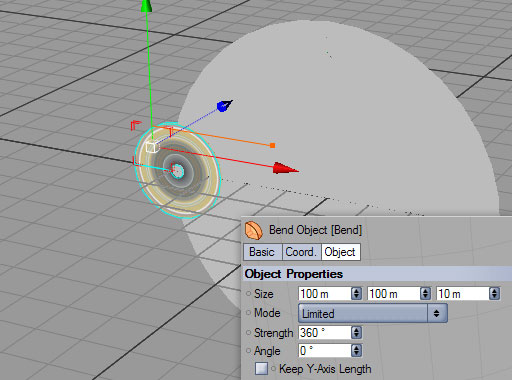 |
|
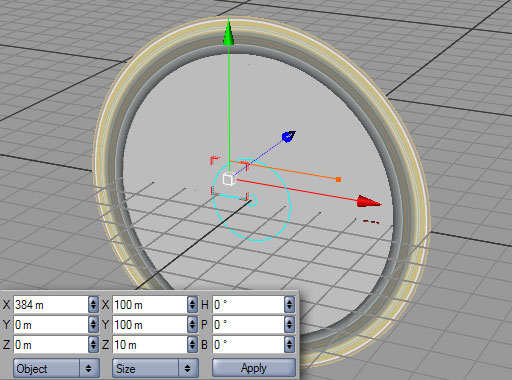
To set the final size of our ring object, move the Bend modifer to the right to increase the inner diameter. Since in this case we want an inner diameter of 400, we need to set the X position of the Bend modifier to (400-16 =) 384 m. Now, we can delete our Disc guide object and set the final object parameters. |
 |
| I have increased the Height Segments of the Plane object to 360 from 100. This will result in a very smoothly curved object in your final renderings. | 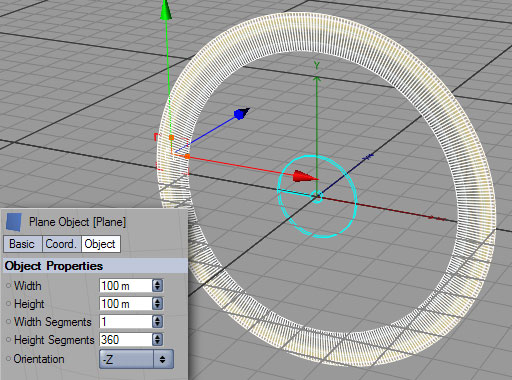 |
| As a final adjustment, add a Null Object to the scene, and place the Plane object into its heirarchy. Rename the Null to "Rings". This will give you a nice centered axis for your ring object, making it easier to move, rotate, or scale in the scene while keeping it centered around the planet. | 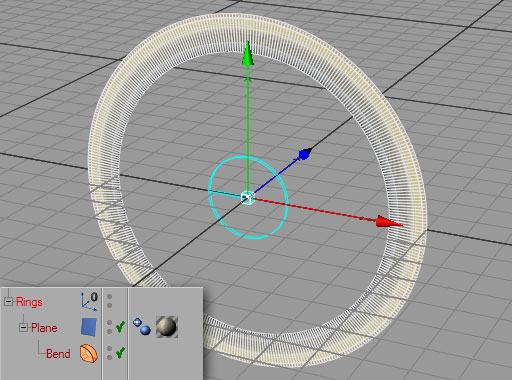 |
| close window | |
this site works best on Firefox: |