| Planet Rendering Tip 1 - City Lights | |
 |
Overview |
|
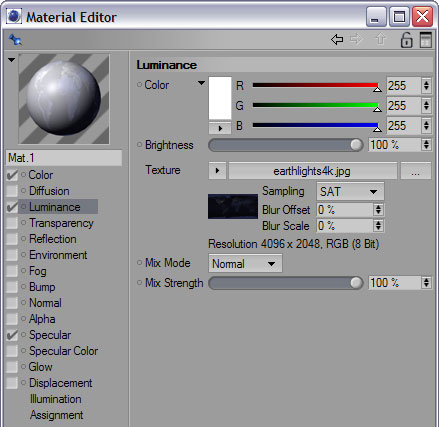
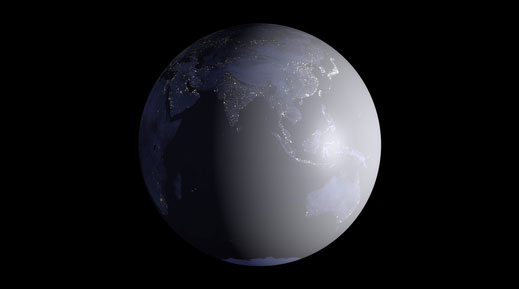
In this tutorial I am ignoring all of the other texture channels that make up a convincing Earth texture, and am concentrating on only controlling the city lights texture to make sure they only show up on the dark side in your render. The first step is to load the city lights map into the luminance channel of a texture. If you render the result, you will see that the city lights and the night time earth color are visible even on the lit side of the planet. This is not desirable. |
|
|
Click the small triangle menu next to the Texture attribute in the Luminance channel, and select Fusion from the list. Then click on the texture preview square to access the Fusion panel. A new texture panel, pictured here, will appear, with the city lights texture already loaded into the base channel. Set the Mode to Multiply, and set the Blend Channel to Colorizer. |
 |
|
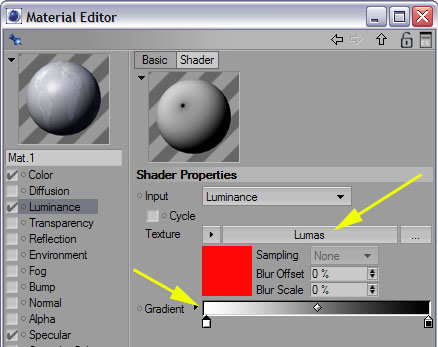
Click the small texture preview under the Blend Channel to open up the Colorizer panel. Set the gradient to be a white to black gradient, illustrated here, and set the Texture to Lumas. Lumas is one of my favorite shaders because it packs a lot of common texture attributes into one surface channel. But for our puposes here, we only want to use Lumas to tell our Fusion blending where light is shining on our object. Therefore we need to change a few settings in the Lumas shader to accomplish this. |
 |
|
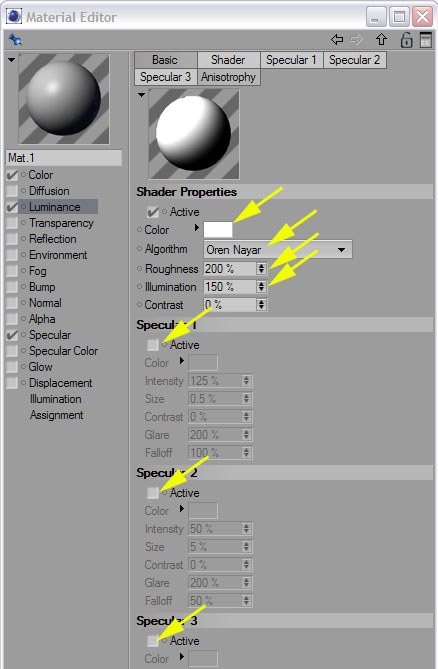
Click the red square texture preview under the Texture area to open up the Lumas panel. Here, we set the color to pure white, disable all of the specular controls, and set the shading algorithm to Oren Nayar, with a roughness of 200 and Illumination of 150. This will ensure that the Lumas will be pure white where the object faces a light source, and black where it faces away from a light source. The Colorizer shader that we have placed this Lumas shader in has an inverted gradient. This will invert the output of the Lumas shader so that it will be black facing the light source, and white facing away. We are then using the output from the Colorizer to multiply these black/white values with the city lights map. The result will be that the city lights will dim in areas where the object is lit, and only be at full strength where the object is in darkness. Perfect! |
 |
|
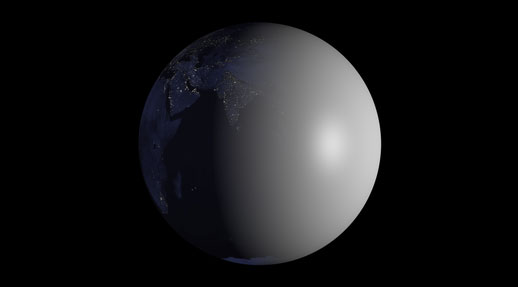
Now, render the result. As you can see, the city lights texture is now dimmed on the bright side of the object, and full strength on the dark side of the object. You can further control the amount of dimming on both the bright and dark side of the texture by adjusting the gradient colors in the Colorizer portion of the Luminance channel hierarchy you have built. You can control how rapidly the dimming effect takes place by either manipulating the Colorizer gradient, or by adjusting the Contrast property of the Lumas shader. |
 |
| close window | |
this site works best on Firefox: |