| Creating Glass Material for Cinema 4D | |
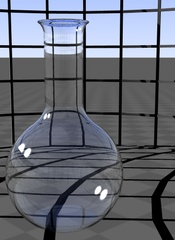 A default glass material as recommended by Maxon, makers of Cinema 4D. |
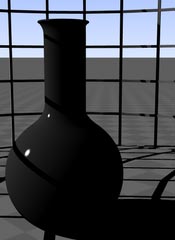
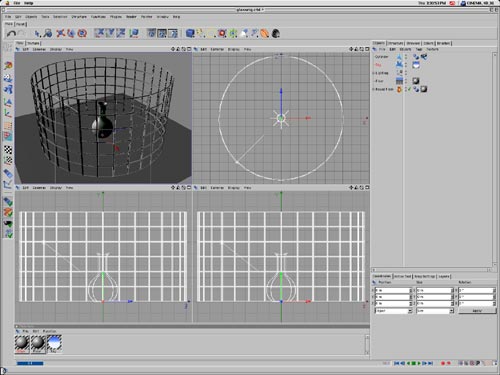
Glass can be a difficult material to capture correctly in a 3D program. Ordinary glass presents us with extremes in nearly every surface attribute. Hard specularity, transparency, reflection, refraction – glass has it all. The transparency and reflective values of glass change with our angle of observation. Glass seems completely transparent to us, yet it casts a shadow. Thus, it is a unique challenge to embody all of these aspects of glass in a material setup. Cinema 4D attempts to address some of these issues in its basic material setup. If you were to make a material that is nearly black, had extreme specular values, gave it transparency with a refractive index of 1.52, and checked off the fresnel and additive flags, you’d get something approximating glass. This is the recommended way to set up glass according to Maxon. In this example you can see a few problems with this
approach: there is a double specular highlight that should not be present,
the glass object is casting no shadow, and it seems particularly dead
and lifeless – it does not sparkle in its environment the way glass
should. This tutorial will take you step by step through an approach to
material creation that examines the way materials behave in real life
and tries to apply those observations to the controls available in the
Materials editor. |
|
|
|
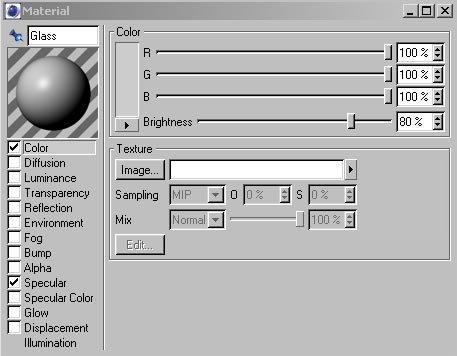
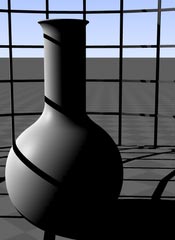 Surface color set to white. |
Step 1 – Color If you look at ground glass – glass where the diffuse property is directly visible because the surface is no longer polished and transparent – you will observe that it is white. So, step 1 of our material setup is to make the material white. |
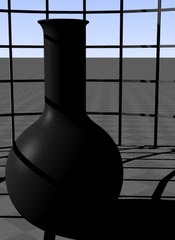 Decreased Diffuse reflection. |
Step 2 – Diffusion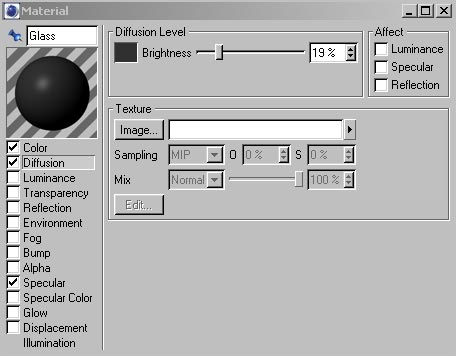 Diffusion level controls the amount of scattered light a surface reflects. A soft, unpolished surface has a higher diffuse reflection level than does a hard, polished surface. So here, we are turning down the Diffusion level of our material to a low level, since glass is hard and polished. Be sure to turn off the "Specular" flag since we don't want this setting to affect the specularity of our surface. |
 The surface diffuse property has been modified. |
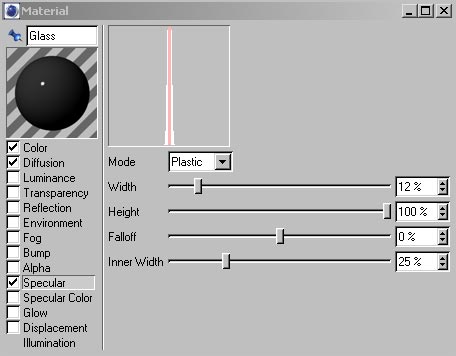
Step 3 - Specularity |
 A Fresnel reflection property has been assigned to the surface. |
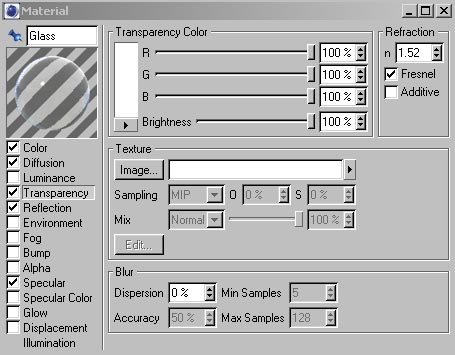
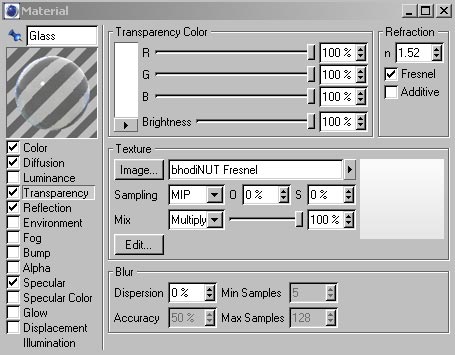
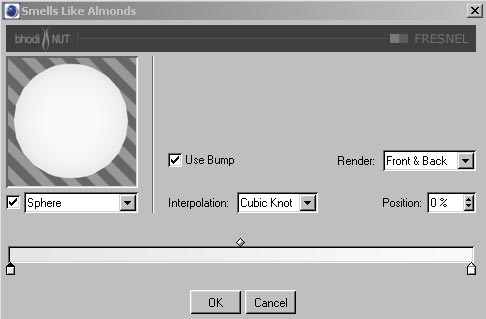
Step 4 – Reflection Glass reflects its surroundings, but not equally so in all directions. Perpendicular views to the surface of glass result in low reflectance. As the angle becomes more grazing or parallel to the surface, reflectance increases to 100%. Here is an explanation of the phenomenon. 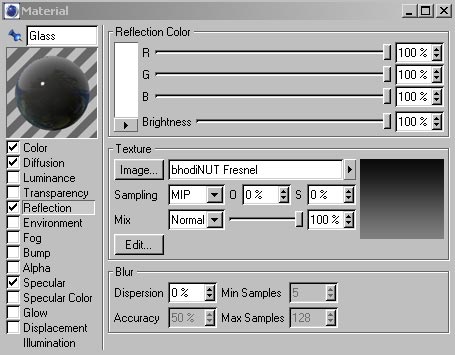  To reproduce this effect in Cinema 4D, it is necessary to make use of the bhodiNUT Fresnel shader. In this example, the setting at the left which controls the Fresnel effect at grazing angles is set to 50% grey. The setting on the right which controls the Fresnel effect at perpendicular angles is set to 4% grey. Later you will see how these values interact with the transparency settings to arrive at the correct final material reflectance. |
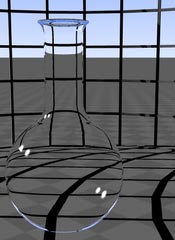 100% transparency applied to the surface. |
Step 5 – Transparency Assign 100% transparency with a refractive index of 1.52 (the index of ordinary glass) to the material and observe the results. 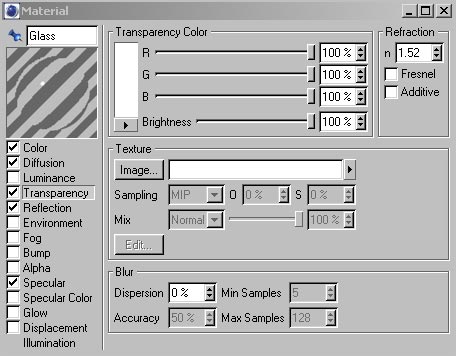 The result is a perfectly transparent surface with specular highlights, but there are several problems with this surface. It has no reflections (despite the reflection settings), it has a peculiar double specular spot, and the object casts no shadow whatsoever. You can address each of these problems. We'll start with the simplest - the Fresnel quality of glass transparency and reflection. Check off the "Fresnel" flag in the Transparency panel, and observe the results. The glass has become properly reflective. The combination of reflectance you get with the Fresnel flag, and the reflectance we set up in the Reflection panel of the Material editor has given us our desired reflectance property - 100% at the edges, and around 4% in the middle. |
 |
 |
 |
However we still have the missing shadow to contend with. In reality, glass is never perfectly transparent. Its transparency is related to the angle of observation in the same way that reflectance is. You can use the bhodiNUT Fresnel shader to emulate this quality of glass.
|
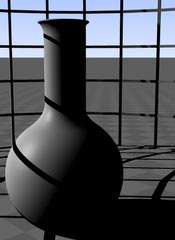
 Blinn illumination model reproduces smooth surface qualities more accurately than does Phong, elmininating the superfluous highlights. Compare the results of this comprehensive glass set up with the Maxon glass material below.
|
Step 6 – Fixing
The Specular Highlights The double specular highlight is a problem. It's being caused by Cinema 4D’s Phong shader, which is creating a highlight for both the outer and inner surface of the glass. You can fix this by changing the illumination model from Phong to Blinn in the Illumination tab of the Materials editor. 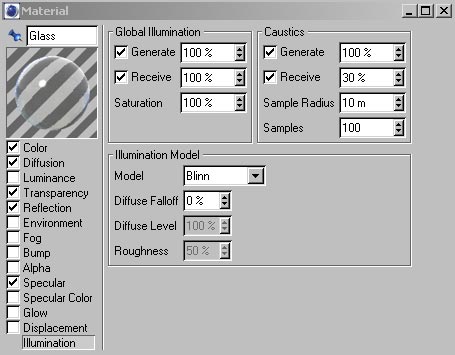
|
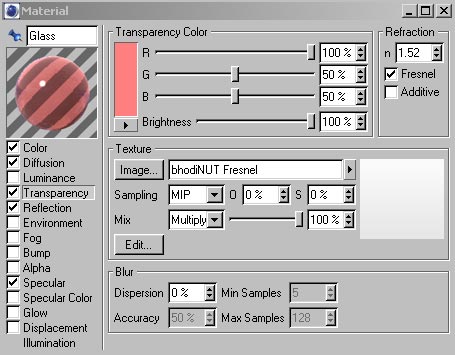
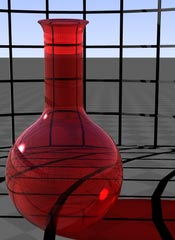 By modifying the transparency properties, colored glass can be achieved. |
Going Further |
| close window | |
this site works best on Firefox: |