| Alternative to Cinema 4D Global Illumination | |||
 |
Overview For this tutorial you are going to need a special plug-in. Go to www.3Dattack.net and you'll find a plugin called LUMEN by Chris from biomekk.com. LUMEN comes in two versions, LUMEN and LUMEN Lite. Have a look at the sample videos for LUMEN and I think you will agree that its a fantastic deal for $35. However, this tutorial only makes use of the LUMEN Lite plugin, which is free (you'll find it on the bottom of the LUMEN page). Download and install the LUMEN plugin in your Cinema 4D Plugins Folder and restart the program. |
||
|
LUMEN Plug-In We are going to use a Sphere as the geometry object. For now, adjust its settings to match the diagram at right. I used Icosahedron because the points of that sphere type are evenly distributed across the object. Normal spheres have points concentrated at the poles. |
|
||
|
Set Up the Lights Here I have set up a gradient and applied that gradient to the sphere. In the LUMEN plugin in, I have set the Set Light Color property to ON, and dragged the gradient texture tag into the Texture Tag box. The gradient's brightess is set very low in the material editor because we have many lights, and each light does not need to be very bright to properly illuminate the scene. I have also adjusted LUMEN's Keep Above parameter so that lights below the floorline will be omitted from the scene. Lumen will use the gradient properties to adjust the color and brightness of the light according to the color and brightness of the gradient at each point on the sphere. You can use anything here for a texture - a simple gradient as in this example, or a picture of a room or scene, or any other texture. |
 |
||
|
Missing Shadows Lets see what can be done to add shadows to the scene. |
 |
||
|
Raytraced Shadows Looking at the results here (which took 11min 27sec) we can see that we are getting some very nice soft, pooling shadows on the body of the object. The shadows fall apart under the object however, releaving their nature as multiple shadows cast by multiple point sources. Well, there is a fix for that, and the fix is called Shadow Maps . Before we enable Shadow Maps, we need to change our light type from Omni to Spotlight. The reason is that Shadow Maps have a fixed resolution - set in the Shadow tab of the Light object properties. When the light type is set to omni, the shadow map resolution is shared every direction the omni light shines — most of it not in the direction of our object. By changing the light type to spotlight, all of the Shadow Map resolution is restricted to the direction the light is shining — on our object. |
 |
||
|
Shadow Maps Under the Shadow tab of the Light object, change the Shadow type to Shadow Map. Set the resolution to be 1000x1000. Set the Sample Radius to 1, and the Absolute Bias to .5m. Render the scene, and lets look at the result. The immediately noticable thing is that the light is more concentrated on our object — the background has receeded into inky blackness. The other noticable thing is that the results are remarkably similar to the ray-traced shadows, but the rendering time has dropped to 1min 53sec. Clearly we are on the right track. |
 |
||
|
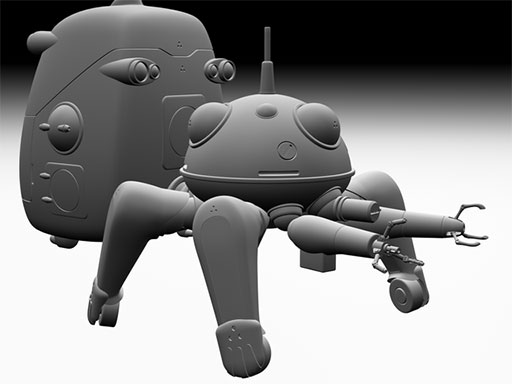
More Lights Because the number of lights has increased, we need to decrease the brightness that each light has. Click on the Light object in the LUMEN hierarchy, and under the General tab, reduce its brightness from 100 to 20. Lets widen the area the light is shining on too — go to the Detail tab, and change the inner angle to 30, and the outter angle to 60. This will have two effects: it will soften the shadow maps a bit by spreading them over a wider area, and it will brighten up the scene some. Render, and lets look at the result. We have very smooth shadows now, nearly as smooth as Global Illlumination. If we had textures on the floor and object, chances are the remaining artifacts would be invisible. Alternatively, increasing the shadow map Sample Radius can help smooth out the remaining artifacts on the floor. Be wary though... shadow maps can have a tendency to leave dark halos around detailed areas — an effect that is creeping into the sample image here. The final render time for this image is only 13min 51sec, nearly half that for the Global Illumination Render. Roll over the image to compare the two techniques. |
 |
||
| close window | |||
this site works best on Firefox: |