| creating normal maps with cinema 4d part 2 | |
| 2 Methods When I originally prepared this page on how to render a normal map using Cinema 4D, I had some complex instructions on how to do it using the bhodiNUT Falloff shader coupled with some fancy footwork with bhodiNUT's Fusion shader. This method is still available here. However, an ingenious guy by the name of Frank Plohmann has written a little COFFEE shader called NLinShader. You can get it here or from Frank's site. Drop the NLinShader.cob file in your Cinema 4D Plugins folder, and the shader will be available to you in C4D's Material Editor. I've modified this page accordingly to demonstrate the method using Frank's shader. Preparing a texture You've created some geometry for a game texture, and the time has come to render it out for use in Tenebrae. I recommend you create two versions of your file - one to create the color map, and another one to create the normal map. This is recommended because you will be alterning the textures and lighting setups for these two versions. Camera placement Global Lighting
3. Edit your rendering settings to perform these edits: Eliminate Cinema4D's automatic lighting system - this is the light that turns "on" when rendering any Cinema 4D scene that contains no lights. Since ours doesn't have any lights, and we don't want the auto light, turn it off. You will also need to activate radiosity rendering. See the settings below:
Your scene should look like the following setup:
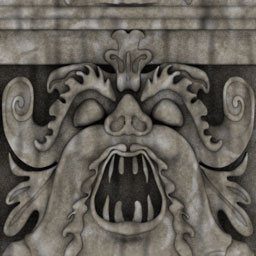
In this shot, you can see the parallel camera framing the texture (green) and the white sphere surrounding the scene, providing global illumination. You should now render out the color map for your scene. Here is an example of a globally rendered color map:
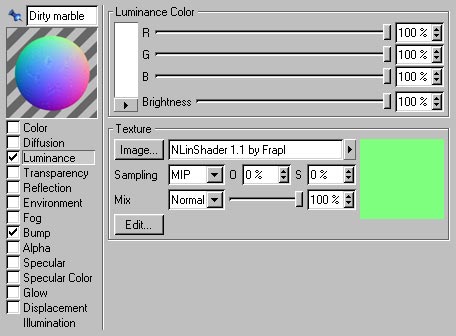
When this is done, save the scene file under a different name because we are now going to change things to render out the normal map from this same setup. Normal Map Setup Here is an example of the settings for the
texture used in this scene:
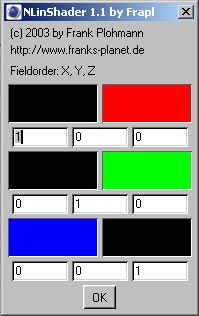
The default values for the shader are preset to produce a standard normal map:
Be sure to modify each texture used in your setup in a similar way - add the NLinShader to the luminance channel and turn off all other channels except for the bump channel. Rendering The Result
This normal map now completely encodes all
of the surface vector information, including bump map information, from
the original Cinema 4D geometry. |
|
| close window | |

this site works best on Firefox: |