| creating normal maps with cinema 4d part 3 | |
|
Preparing
a texture Camera placement Global Lighting
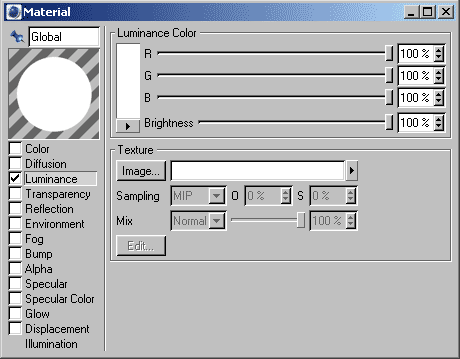
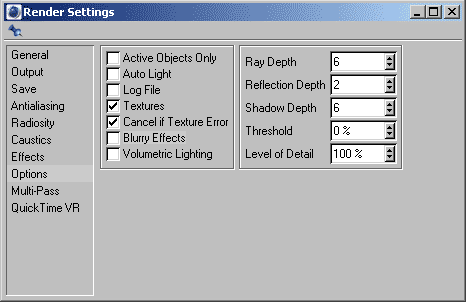
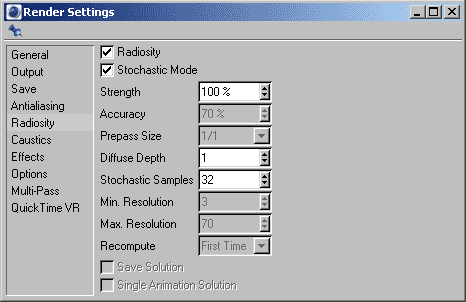
3. Edit your rendering settings to perform these edits: Eliminate Cinema4D's automatic lighting system - this is the light that turns "on" when rendering any Cinema 4D scene that contains no lights. Since ours doesn't have any lights, and we don't want the auto light, turn it off. You will also need to activate radiosity rendering. See the settings below:
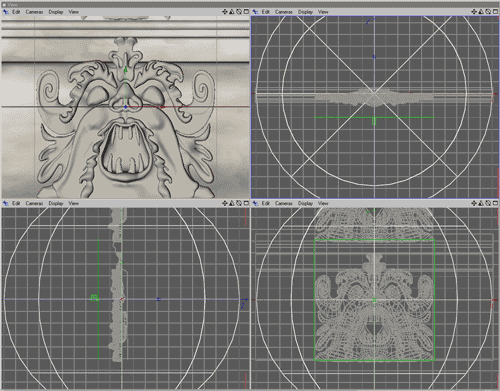
Your scene should look like the following setup:
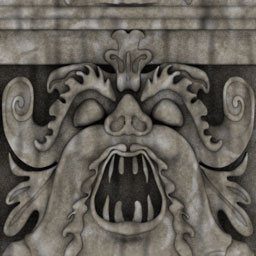
In this shot, you can see the parallel camera framing the texture (green) and the white sphere surrounding the scene, providing global illumination. You should now render out the color map for your scene. Here is an example of a globally rendered color map:
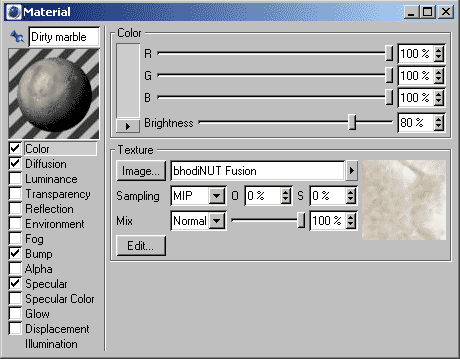
When this is done, save the scene file under a different name because we are now going to change things to render out the normal map from this same setup. Normal Map Setup Here is an example of the settings for the
texture used in this scene:
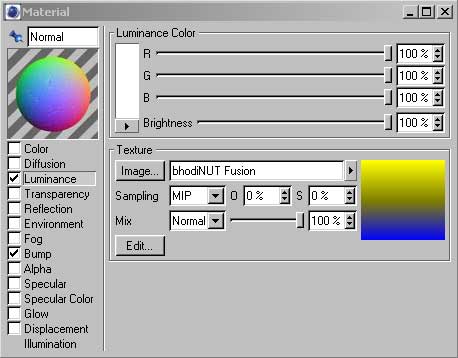
Cinema 4D comes with a rich set of texture plug-ins from bhodiNUT. One of these textures, called Falloff, renders color into the surface according to the surface's normal, with respect to the scene "world" space. We will use three sets of the Falloff texture to create normal coloration in the X, Y, and Z directions, and combine these textures using the bhodiNUT "Fusion" texture. Here is the setup:
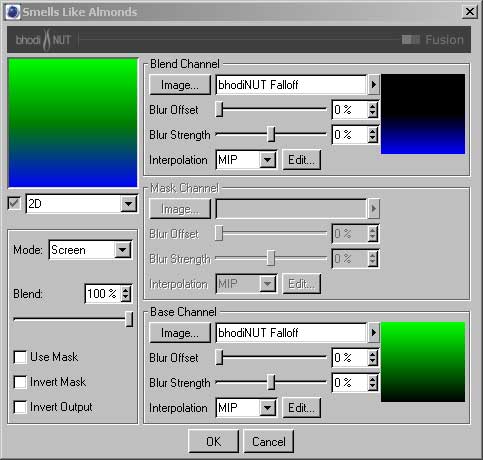
Since Fusion can only combine 2 textures at a time, we will have to nest two Fusion materials in order to combine 3 of them for our normal texture. Here is the first level of the Fusion setup:
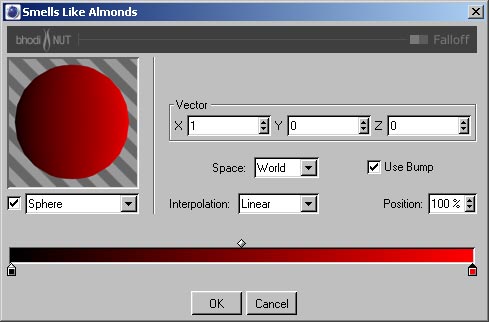
Here, the base channel is set to bhodiNUT Falloff, with the following parameters:
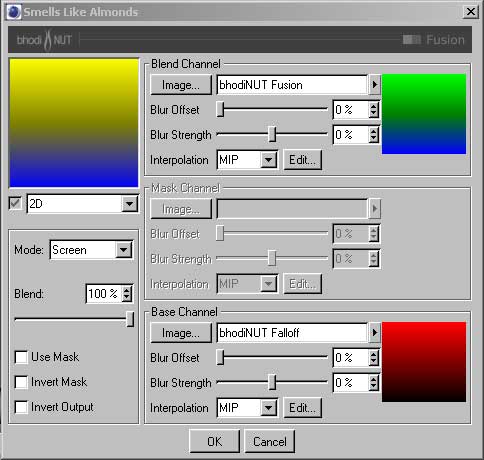
As you can see here, the vector is set to the X direction, and we set up a linear gradient from black on the left, to 100% red on the right. This corresponds to what we know about how a normal map is constructed. The blend channel is set to bhodiNUT Fusion again, where we can combine our two other normal textures. Here is the setup for this second Fusion level:
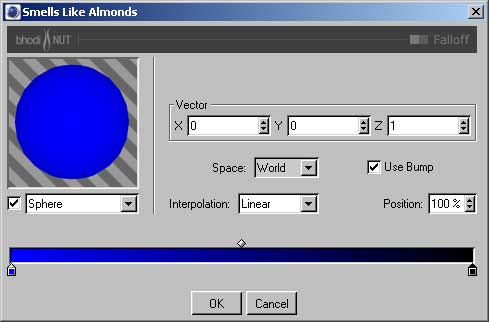
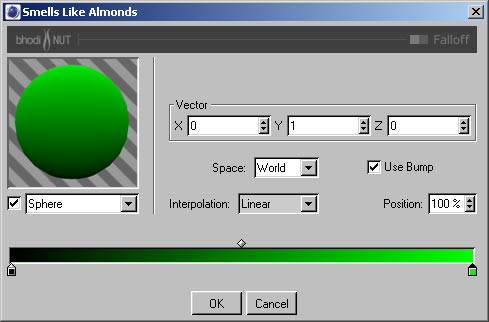
Both channels of this Fusion setup are bhodiNUT Falloff. The top one is set up in the following way:
The vector is in the Z direction, and the shading goes from 100% blue to black. Since no part of the surface pointing away from the camera will be visible, the blue channel will only contain values from 100 to 50% The base channel setup is as follows:
The vector is in the Y direction, and the shading goes from black at the bottom, to 100% green at the top. The blending modes for both levels of Fusion should be set to "Screen". This allows all the normal texture colors to be added together.
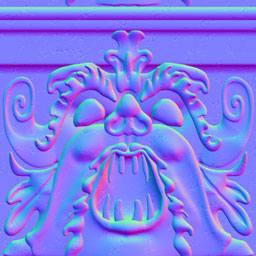
This normal map now completely encodes all
of the surface vector information, including bump map information, from
the original Cinema 4D geometry. |
|
| close window | |
this site works best on Firefox: |