Bulb Modelling Tutorial - Page 3 |
|
Step 5:
Now we are ready to start in Cinema 4D. Create a new material, and place
your lightbulb template image in the color channel. Take note of the pixel
dimensions of the image. Create a Plane object, orientation in -Z and
make the width and height of the plane object to be the same as the pixel
dimensions of your template image. Apply the material to the plane. Set
the material transparency to ON, and the plane object will "ghost"
back, which will make it easier to see your work as you go. Pull the plane
back in Z a bit to give you room to work on the bulb as you create it.
Go to the Object hierarchy and add a DISPLAY tag to this object. Tick
off the USE box on the first tag attribute, and change the display mode
to GOURAUD shading. This will allow it to be visible in the various views.
|
|
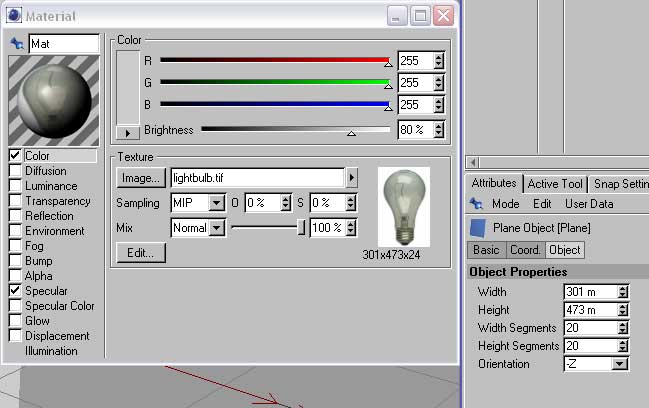
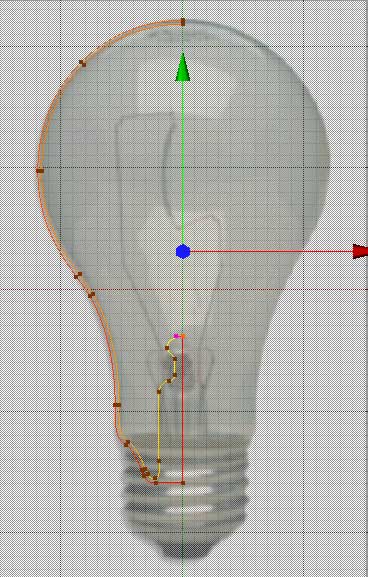
Step 6:
From the file menu, MERGE the curve you created in Illustrator. First step
is to switch to Axis mode, and reposition the axis point to a world value
of 0 in X. Hit F4 to switch to FRONT projection, and then switch back to
Object mode to position/scale the curve till it matches up with the template
image. Since we were careful to position the zero point at the edge of the
curve in Adobe Illustrator, you should only need to position the object
in the Y axis only, and scale it to fit the template. Its important that
the right most points of the curve remain at a world value of 0 in X. |
|
Step 7:
Switch to Point mode, and click the topmost point of the curve, and right
click to bring up the contextual menu. Choose Set First Point. Go to the
curve attributes and turn off "Close Curve", What should happen
is that the curve will have no connecting segment between the two points
at the top of the curve. Add a Lathe object to the scene, and parent it
to the curve.
|
|
|